Guides people can actually follow
User guides, owner's manuals, and quick reference guides across automotive, fintech, and payments. The step-by-step stuff that gets someone unstuck.
The guides below are ones I wrote for PayiQ, a cloud-based payments platform. When I got there, there wasn't much of anything. No manual, no guides, no standards. They brought me in to set up the processes and get the documentation organized, and these were part of that.
I made them for both the support team and customers, to cut down on support calls and the same onboarding questions coming up over and over. The idea was simple: easy walkthroughs of the tasks people did most. Here are two of them in full.
Adding equipment to a location
This one covers adding equipment to both an existing location and a new one. It's written for the ISO user. (Merchant users can see the equipment for their location but can't add it.) Only one Virtual Terminal can be added per location, which the guide accounts for.
Adding equipment to an existing location
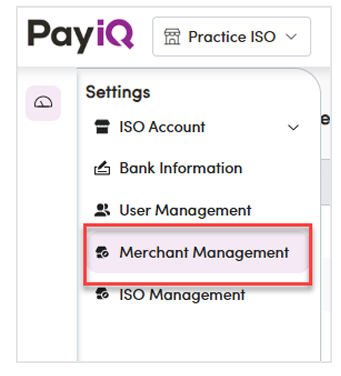
Navigate to Settings > Merchant Management.
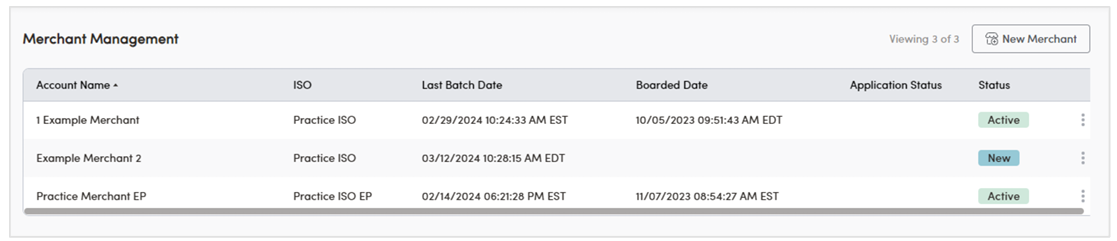
Select the Merchant.
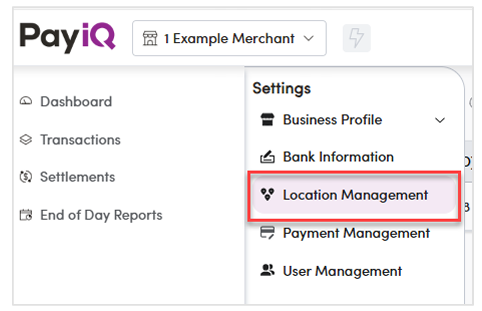
From the Merchant, select Location Management.
Select the Location you'd like to add equipment to.

Under Equipment Inventory, click the button to Add Equipment.
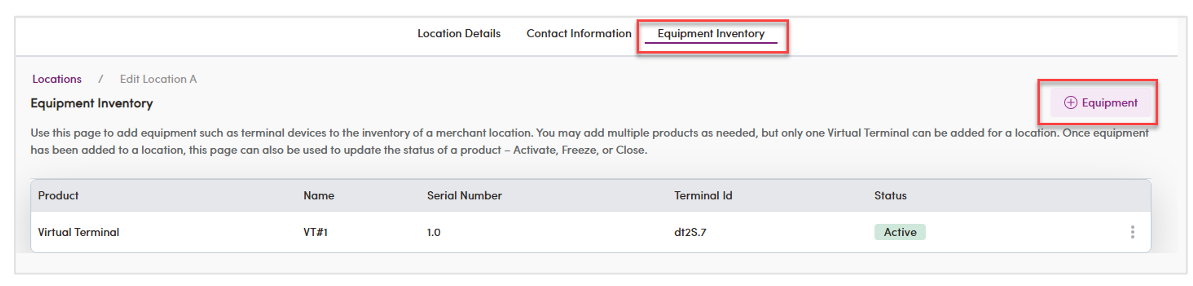
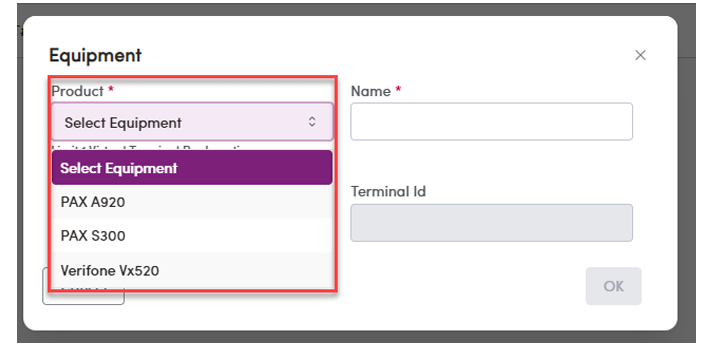
Enter the Equipment information. Product and Name are required.
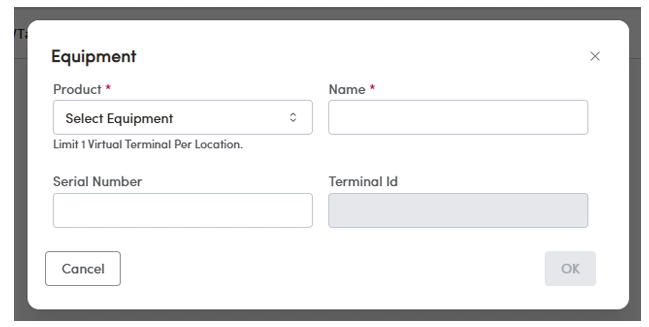
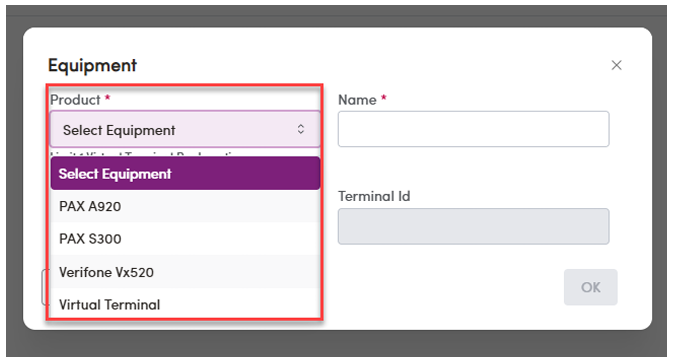
If there's already a Virtual Terminal for that location, the option won't appear in the Product dropdown.
Adding equipment to a new location
Navigate to Settings > Location Management.
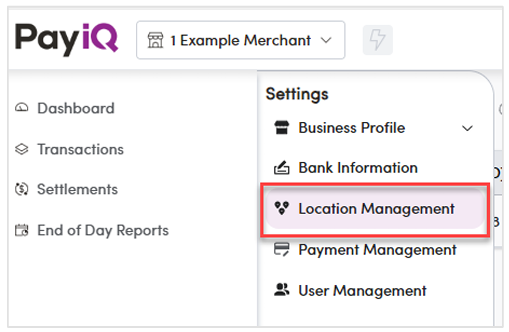
In Location Management, click the button to Add Location.

Complete each page required for a new location. Under Equipment Inventory, click Add Equipment.
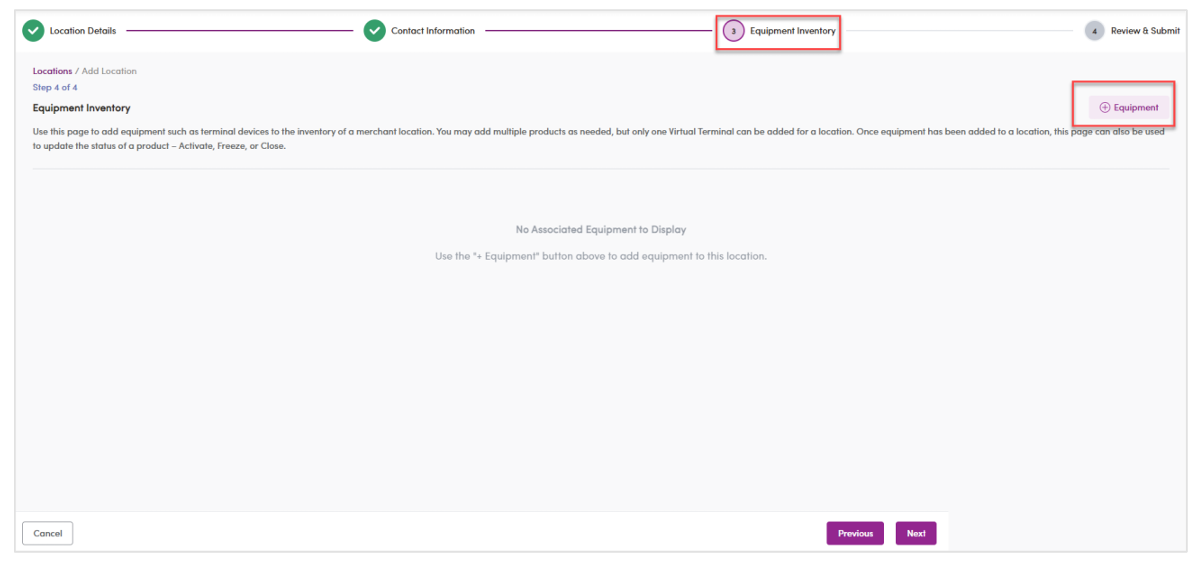
Enter the Equipment information. Product and Name are required.
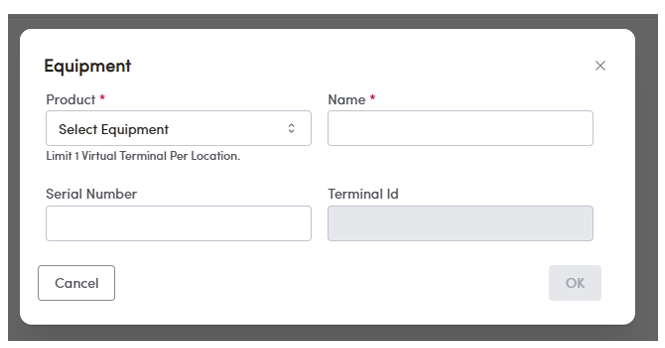
Since there's no existing Virtual Terminal for the new location, that option will appear in the Product dropdown.
Refunding a transaction
A Merchant or ISO user can refund a transaction right from the Transactions table in the PayiQ portal. Five steps, start to finish.
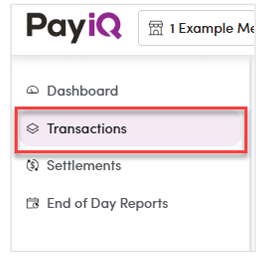
Select Transactions from the menu on the left side of the portal.
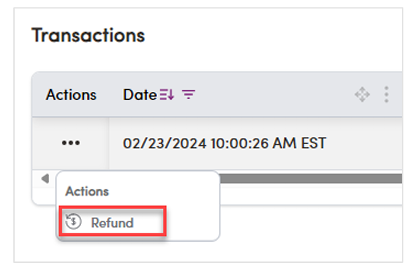
Under Actions, click the three horizontal dots and select Refund.
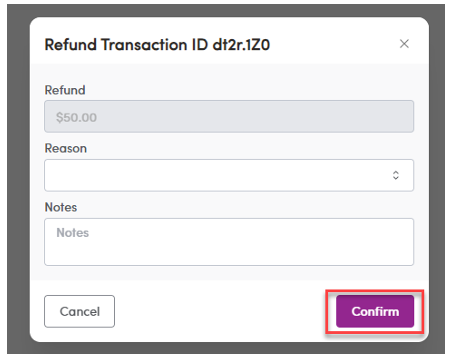
In the popup, select the Reason, add any notes, then click Confirm.
A message appears at the bottom of the page indicating the transaction's status has been updated to Refunded.

The transaction now shows as Refunded under Status. Note: columns in the Transactions table can be reordered, so Status may appear in a different spot depending on your configuration.

The feedback was good. People told me the guides were clear and useful, and that they made the software easier to understand for both customers and our internal teams.